Showing posts with label TECH TIPS. Show all posts

Adsense Ads not Showing on BLOGGER and how to Fix it and 6 reasons why not showing

Almost every publisher of the Adsense program must encounter blank ads for a reason on their blog. There are lots of reason why you can have google ads not displaying on your blog.
As we all know that Adsense is one of the best contextual ad networks that we have they boast of sharing thieir profit gotten from the advertisers on a 70% to 30%.
Not only been the best network, they can be very hard to get full approval. You can place your Adsense code anywhere in your blog. I have heard a lot of people complaining about their Adsense ads not showing on their blog, So I compiled 6 causes why you are having blank ads on your blog.
Causes of Adsense Ads not Showing


1. Buying a Custom Domain
This is the major reason why 90% of people have their google ads not displaying. If you got your Adsense approval like a Host platform like Blogger, For example, you got your Adsense approval with (www.example.blogspot.com) in other for you to display ads on (www.example.com) you will have to apply for a Non-hosted account
From the time that you purchased the custom domain, you will continue to see blank ads till google team finish reviewing your site and accepting it, if they reject your blog you will either have to remove the ad code and work on fixing the reason why you were rejected and apply again.


2. The Ad Code was Newly Created
You should have noticed that anytime to generate a new ad code and paste it on your blog, for a while it will show blank ads because the code was newly generated. 
So you will have to wait for some time, close to 30mins -1hr before you start to see like Ads. And if yours is taking a long time you can contact Adsense or Send them a feedback on your Adsense dashboard.

3. Adsense Bot didn't Find relevant Ads for your website
If you are trying to create a new code in google Adsense under backup ads you will see where you chan choose what to display if
 The ads that you'd prefer to show when Google has no targeted ads available. By default, we'll show a blank space. However, you can also choose to display ads from another URL or a solid colour instead.
So if Adsense bot doesn't find relevant ads to display to your content it will just show blank ads instead. To fix this you must make sure that the website that you are trying to implement the code has sufficient content has a targeted niche.

Also see: How to Place Adsense Below Post Title in Blogger

4.  The Web Page is Violating their Policy
Adsense have stated in their program policy that website based on some niche should not apply for the program.
So if the discover that you have implemented your as code a website that is violating its policy, they tend to show blank ads on those websites. They Adsense team will them mail you and ask you to remove it or risk your account been ban.

5. Newly Accepted to the Program
If you just got accepted into the AdSense program and you are trying to implement the ad code on your website and you discover Adsense ads not showing, don't panic just relax , it takes a while before they finish compiling your account.
And if it's taking a longer time you can contact them directly or send theme a feedback.

6. Generated Ad code Might be Bigger than Ad Space
If you generated a 720*90 ad code and you are trying to put it on your side which can contain only 300*250, in most cases that would resolve to display blank ads.
You can fix it by generating the required ad size for a particular ad space.

I hope this article was Helpful?
Dont forget to share if you found a reason to

SOLUTION-Playstore Crashing on BLACKBERRY 10


Recently, some users have been experiencing an issue with the Play Store crashing, “Unfortunately, Google Play Store has stopped.” The crash occurs when downloading or updating an app though the Play Store. To fix, simply uninstall the existing Play Store and install the new version here (do not update):

⧭⧭⧭⧭PLEASE COMMENT FOR ANY ISSUES⧭⧭⧭⧭⧭ 

PLAY STORE FOR BLACKBERRY INSTALL GOOGLE PLAY STORE TO BLACKBERRY 10


INSTALL GOOGLE PLAY STORE TO BLACKBERRY 10


Learn how to install the Google Play Store to your BlackBerry 10 phone such as the Z10, Z30, Z3, Q5, Q10, P9982, P9983, Passport, Classic, Leap, Priv, and more! BlackBerry users may have noticed that the BlackBerry World app store is very limited but now you can sideload the Play Store to your BB10 phone. Follow our easy, step-by-step tutorial to get access to the best Android apps like Google apps, Instagram, Clash of Clans, or Candy Crush.
Once the Google Play Store is installed to your BlackBerry, you will be able to download and install Android apps and update them as well.

Install Google Play Store to BlackBerry 10

Requirements
  • BB10 device running BlackBerry OS 10.3 or later.
1. Go to Settings > App Manager > Installing Apps > and turn on ‘Allow Apps from Other Sources to be Installed


2. Open a browser and download Google Play Services APK:
3. Open the file and press Install
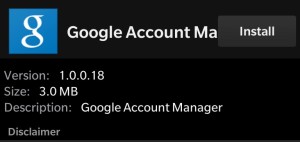
4. Open a browser and download Google Account Manager APK:
5. Open the file and press Install

6. Open Google Account Manager and sign into your Google Account


7. Exit and download BlackBerry Google ID APK:
8. Open the file and press Install

9. Open Blackberry Google ID and press Register this device

10. Exit and download Google Play Store APK:
11. Open the file and press Install
That’s it! You will now have access to the Play Store on your BlackBerry phone. You can now download, update, and purchase apps with your phone. Please note that not every app will run on the BlackBerry.

Common Issues:
Recently, some users have been experiencing an issue with the Play Store crashing, “Unfortunately, Google Play Store has stopped.” The crash occurs when downloading or updating an app though the Play Store. To fix, simply uninstall the existing Play Store and install the new version here (do not update):
Thanks to Cobalt232 from CrackBerry forum for making this possible.

Clear Or Refresh Your DNS Cache


Sometimes, when we have a blog published to a Google Custom Domain, we'll make a change to the domain DNS configuration and notice that our readers can see the change, but we can't.
Once again, at 6:23, someone was able to see my blog and leave a comment

Yet, moments after I tried, I was still getting the 404 error. So there seems to be some intermittent activity!
This is not an unusual report.

Problems with custom domain publishing almost always involve some sort of DNS issue.

Let's look at a hypothetical domain DNS configurations, as one example. First, current:
mydomain.com.   14400   IN      A       216.21.239.197
www.mydomain.com. 14400      IN      A       216.21.239.197 

Then, new:
mydomain.com.   14400   IN      A       64.233.179.121
mydomain.com.   14400   IN      A       72.14.207.121
www.mydomain.com. 14400      IN      CNAME   ghs.google.com. 

Note that the above addresses have long since changed. We now have a quadruplet "A" address complement - which is a bit harder to notice, casually.

A TTL of 14400 seconds (4 hours) is a bit extreme. I see mostly 3600 seconds (1 hour), sometimes 900 seconds (15 minutes), in most DNS configurations.

If the TTL for your domain is 4 hours, it could be about that long after you make the change, before you start seeing any change.

I say "about", because the age of the configuration information, as cached on your computer or server when you make the change, is relevant. If the information is 15 minutes old, then with a TTL of 14400, you'll have to wait another 13500 seconds, or 3 3/4 hours. If the information is 3 hours old, you'll wait merely another hour.

Fortunately, you can hasten that if if the cache on your computer is the bottleneck.

From a command window, enter
ipconfig /flushdns
If the DNS cache in question is on your computer, it's gone now. The next time that you try for your custom domain, it should come up in its new configuration.

Note 2 Caveats

  • If you have a caching non-authoritative DNS server that your computer retrieves DNS directly from, you'll still have to wait. The "ipconfig" command works only under Microsoft Windows, and only on the computer with the cache. If the cache is upstream from you, you're going to have to remain patient.
  • Whether or not your local DNS cache, and your upstream non-authoritative DNS server gets the updates, you still can't predict the update status of the Google non-authoritative DNS servers.

Knowing your DNS setup is a good idea, when working with custom domains. And allowing for DNS latency at Google is essential.

New Samsung Galaxy Note 8 Leak Hints At More Secrets: What Are Those Cutouts For?-VAN_NEWS


A new leak for the Samsung Galaxy Note 8 shows that Samsung might still be holding some secrets for the highly anticipated smartphone. An updated screen protector for the device features cutouts with currently unknown purposes. (Photo : OnLeaks | Twitter)

Samsung Galaxy Note 8 rumors are everywhere, already revealing most of the details that customers can expect from the upcoming smartphone. However, a new leak shows that Samsung might still be holding some secrets for the Galaxy Note 8.
Samsung may have already revealed the design of the Galaxy Note 8 ahead of schedule through a tweet promoting the Exynos 8895, but the new leak takes a closer look at the smartphone's front panel

Samsung Galaxy Note 8 Screen Protector Features Six Cutouts

OnLeaks, a reliable source of leaked information, tweeted a photo that contained three variations of a Galaxy Note 8 tempered glass screen protector. OnLeaks claimed that Chinese manufacturers have started updating their products as the Galaxy Note 8 release draws nearer.
The obvious difference between the three Galaxy Note 8 screen protectors is the cutouts that are housed at the top bezel.
The first screen protector, dated June 16, contains four cutouts, while a CAD drawing by OnLeaks from June 27 featured six cutouts. The third screen protector, which also has six cutouts but at different sizes compared to OnLeaks' CAD drawing, is the newly leaked one.

What is Instagram Stories and how does it work???-VAN_NEWS

What is Instagram Stories?

Instagram has described its new Stories feature as something that lets you "share all the moments of your day, not just the ones you want to keep on your profile". The feature basically enables you to share multiple photos and videos, and they appear together in a "slideshow format", which basically means a reel, like Snapchat. And, of course, these photos and videos will disappear after 24 hours. Seriously.
You can even add text and doodles to your photos and videos. See? We weren't kidding; it's exactly like Snapchat Stories.

How does Instagram Stories work?

Posting;

Tap the camera button in the top left of your screen or swipe right from anywhere in your Instagram Feed. Then, tap or long press the record button at the bottom to take a photo or video, respectively. You can also tap Boomerang to take burst photos that loop forward or backward, and you can swipe left to go hands-free. Either way, once done, tap the doodle, text, or sticker icons to add effects.

Once you're finished editing, you can save your creation to your phone or tap the + circle icon to share it to your story. Photos and videos you share to your story disappear from the feed and your profile after 24 hours. If you don't want someone to see your story, you can hide your story from them. Just tap the profile icon to access your profile, and then tap the settings/more button.
From there, select Story Settings below Account, then tap Hide Story From, and select the people you'd like to hide your story from. Simples.

Viewing

When you post a photo or video to your story, it appears on your profile (a colourful ring will appear around your profile picture, and people can tap it to see your story) and at the top of the Instagram feed (your profile picture will appear in a row at the top of your followers' feeds, and they can tap it to see your story). Stories shared publicly may also appear in the
Search & Explore tabs.
Additionally, if you've added a hashtag, location, or location-based sticker, it may also appear on
hashtag or location pages.

Replying

You can now reply to stories with a photo or video. In addition to writing a message reply, you can also respond with an image. When you're watching a story, there's a new camera button at the bottom of the screen. Tap that, and then snap a pic of yourself or record a video or take a Boomerang. You can move and resize the story image that you're replying to, as well, and insert that in your photo.
From there, apply filters or stickers, and when you're done, hit send to share your creation with your friend. Your friend will get your photo/video response in their Direct message inbox, along with the thumbnail of the original story.

What else can Instagram Stories do?
Add effects: Like Snapchat, you can add doodles, text, stickers, live face filters, and geostickers to your story.
See who's watching your story: When watching your own story, swipe up to see who’s watched each photo and video.
Make your story private: If your account is set to private, your story will only be visible to your followers. You can also hide your entire story from anyone you don’t want to see it, even if they follow you.
Post your story to your profile: Your Instagram Story by default won’t appear on your profile grid or in feed, but you can choose to feature a particular part of your story by posting it on your profile.